|
|
Post by twrnz on Jan 2, 2021 9:08:21 GMT
Cannae again today as we finished tuning of our DBA scenario. The Romans pressed the Punic centre, which slowly fell back, while Hannibal sought victory on the flanks. The outcome swung back and forth as first Hannibal then Varro gained the advantage. Unfortunately for Hannibal, his Numidians & centre would finally collapse before he could achieve victory on the left.  Above, the lines advance while below the Numidians, overconfident, press forward.  A fine game where the result hung in the balance until almost the end. Unlike the historic battle our post battle review was held in the comfort of our local pub over a couple of pints. Perhaps tomorrow we will switch sides and refight the scenario again. |
|
|
|
Post by twrnz on Dec 31, 2020 20:09:22 GMT
We have now played through Cannae twice as we continue to develop the scenario. As before the standard DBA armies have been modified somewhat but still comprise around 12 stands, as is the aim of this exercise. After two refights we will however change the Roman army composition slightly further in an attempt to tune the scenario and victory conditions. Polybius, Daly & Sabin’s Lost Battles have all been useful sources as we put together this scenario.  Above, a scene from the first refight, while below that from the second.  The core components of the battle are now being successfully being modelled, which is pleasing. Hopefully today time will allow further refights of Cannae to further refine the scenario. |
|
|
|
Post by twrnz on Dec 31, 2020 0:51:23 GMT
Keith, that's a great mini campaign. And swapping sides adds interest. Cheers, Yes, it is proving very interesting and switching sides is rewarding from a refight perspective but also understanding the scenario. I had hoped to finish my Spanish which are really needed for Ilipia but unfortunately they are not ready yet. |
|
|
|
Post by twrnz on Dec 30, 2020 8:48:14 GMT
Over recent days my son and have been refighting some historical battles from the Punic Wars, in between family commitments of course. After working out scenarios we play through the battle before switching sides. The scenarios use armies of around 12 stands, though some are larger or have lists modified slightly in keeping with historical troop ratios. In some cases special scenario are used. The first battle was the Bagradas (255 BC) which we have refought twice. The Romans fielded more infantry than the Carthaginians, as was the case historically, but the Roman cavalry were was outnumbered by Carthaginian horse. The Consul Regulus tried desperately to unhinge the cunning Xanthippus whose cavalry & elephants were particularly effective. The result was two victories to Carthage.Below, a photo from one of the refights of Bagradas.  Next was Trebbia (218 BC). Here the over confident Sempronius pressed across the freezing Trebbia river to be engaged by Hannibal. Refought three times the use of some special scenario rules added additional interest and resulted in three fascinating games. Below, a photo from one of the refights of Trebbia.  So far five extremely interesting games which have generally followed the original course of the historical battles. We have now moved on to Cannae. Currently we are fine tuning the orders of battle and scenario. |
|
|
|
Post by twrnz on Dec 26, 2020 8:38:37 GMT
Punic War today with Hannibal campaigning in Italia. Hannibal faced the Romans on an open plain. The Roman consul massed his Roman and Italian cavalry on his left in an unusual deployment hoping the recent rain may have caused the fields on his right to be muddy. Hannibal meanwhile massed his cavalry opposite including his Numidians. His centre and left comprised his heavy infantry and light troops respectively. He now attempted to draw the enemy forward on his right while crushing the Roman right. The Carthaginian left advanced with the light troops attempted to disrupt the Roman hastati opposite.  The Roman centre pressed forward to clash with the Punic heavy infantry who where particularly resolute. With the centre holding the Gallic mercenaries surged forward breaking a portion of the Roman line.  While the Numidian cavalry where under significant pressure on the right flank the overstretched Romans centre was unable halt the Gauls and ensuing attacks by the Punic heavy infantry.  Casualties mounted until finally the Roman centre broke, the slaughter complete. |
|
|
|
Post by twrnz on Dec 19, 2020 20:27:26 GMT
|
|
|
|
Post by twrnz on Dec 9, 2020 7:42:24 GMT
I can only hope you are disappointed at Edward’s success, rather than the summary.
|
|
|
|
Post by twrnz on Dec 8, 2020 10:32:24 GMT
Edward IV has continuing his campaigning in France. Frustrated by English sieges Louis dispatched another field army. Edward, in due course deployed his army for battle.  The French commander massed his gunnes on his right where he hoped to cause much mischief upon the English left. Yet it was the English gunners who caused havoc - against the French left where they caused heavy casualties among the French archers.  Slowly Edward advanced against the French centre and right. Frustrated with the English archery the French centre surged forward and the lines were locked in combat. A breakthrough by French foot in the centre was narrowly halted by Edward who charged at the head of his bodyguard cutting down the French foot. The English left advanced, driving back archers and pressing the French gunnes. In desperate fighting the English billmen overran several French gunnes.  Now, as the gunners fled, the French army broke. Edward it seemed had won another victory. |
|
|
|
Post by twrnz on Dec 2, 2020 2:36:35 GMT
Yes, Louis is a concern. He is highly likely to come up with a very cunning plan for revenge.
|
|
|
|
Post by twrnz on Dec 1, 2020 9:04:07 GMT
A few photos of tonights stirring game. Having secured England and bought peace & prosperity to the realm Edward IV determined in 1475 to campaign in France. The cunning French selected the battlefield with care. They deployed their men at arms in the centre well supported by archers their large artillery train. No sooner had the English moved forward than these great guns proceeded to belch fire. 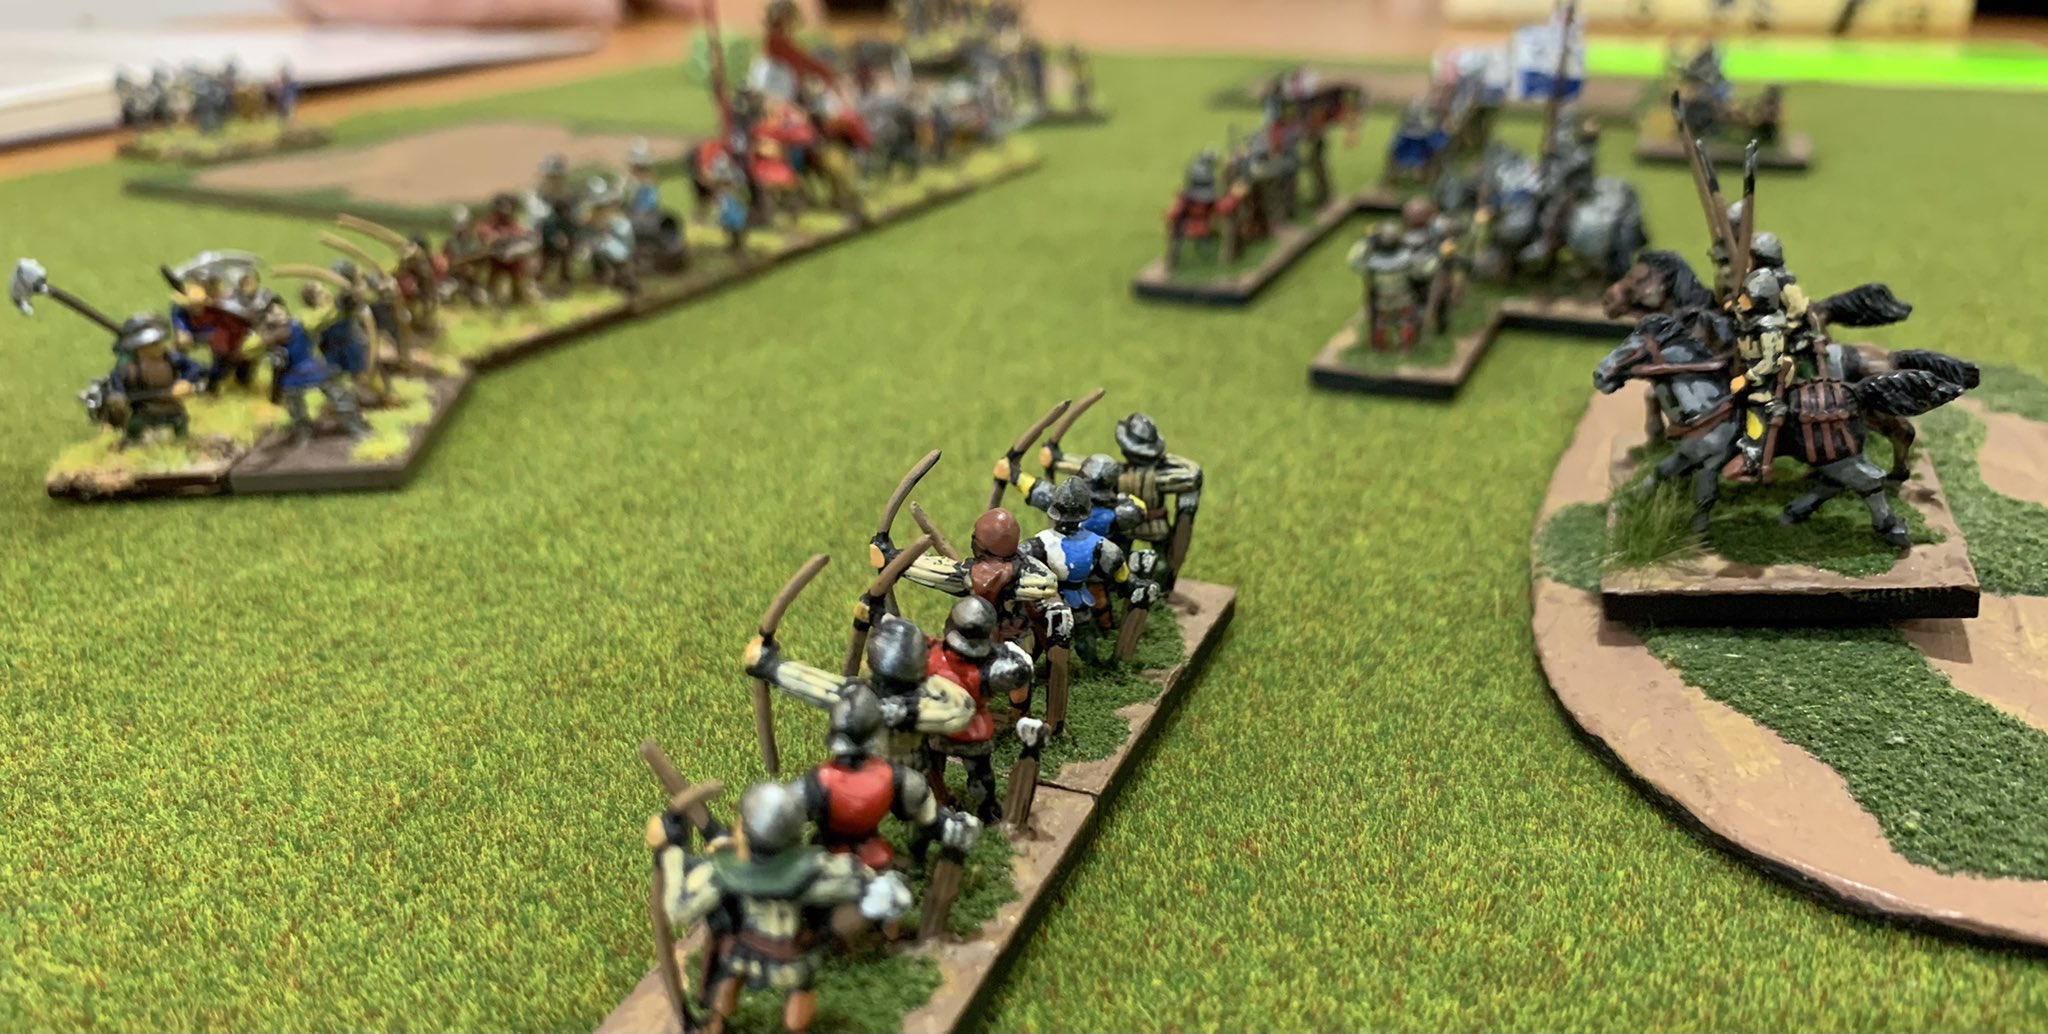 On the English right Edward’s own artillery returned fire with great effectiveness. However, the battle was to be decided elsewhere. Advancing against the French centre & right the English men at arms were met with massed French archery and the continued ferocity of the artillery of the right.  But Edward pressed his attack with vigour and eventually the English billmen, stiffened with dismounted men at arms, cut their way to victory. |
|
|
|
Post by twrnz on Nov 25, 2020 8:33:42 GMT
We had a discussion about the merits of 3Wb over 4Wb. The Gallic player likes the additional movement that 3Wb provides. I think 4Wb would have been useful.
He is an experienced player and frequently plays DBMM. So I suspect that Rome will face further problems in the future.
|
|
|
|
Post by twrnz on Nov 25, 2020 6:14:09 GMT
Another great report Keith. Looks like the Gauls forgot to partake of the magical elixir 😏. Cheers, Indeed! Rumours are the Gauls will be back next week seeking revenge! The Gauls are a challenge to at the best of times, but BBDBA creates interesting issues for both armies. There was a couple of breakthroughs but fortunately Roman reserves plugged the line, but only just. |
|
|
|
Post by twrnz on Nov 24, 2020 9:06:22 GMT
This evening we again deployed our armies for another Big Battle engagement. In 237 BC the Senate sent Lucius Cornelius Lentulus Caudinus north to face the increasingly active Gallic tribes. Selecting an open plain Caudinus waited for the enemy host to form opposite. Now with the enemy deployed he expanding his left while advancing his centre and right. The Gauls of course swept forward, aiming to destroy the Roman centre & left.  However, the Gallic foot were first slowed by the velites, then disordered, they were subjected to a series of Roman counterattacks. The focus being the exposed Gallic centre. These Roman attacks were relentless and soon the Gallic centre began to falter, before finally becoming demoralised.  Meanwhile the pendulum of battle had been swinging back and forth on the Roman left. For a time Gallic victory seemed certain. Now with the Gallic centre demoralised, the Gallic commander pressed his cavalry for one last effort on his right, even hoping to kill Caudinus. Yet Roman resolve held and it was the Gallic right that would finally break. Now, with the Gallic right and centre crippled the Gallic host disintegrated. Rome, it seemed, had secured another hard fought victory. |
|
|
|
Post by twrnz on Nov 17, 2020 9:13:14 GMT
The Road to Magnesia: Tuesday evening provided an opportunity for a long overdue BBDBA engagement, a change from our normal DBA clashes. The Polybian Romans were initially slow to advance opting for a cautious deployment well screened by light troops. The Seleucid commander in contrast advanced quickly in the centre and on his left where his his complex army of phalangites, elephants, scythed chariots and heavy cavalry were concentrated. First to be engaged was the Seleucid left and Roman right. Here, the advantage first going to the Seleucids, but then slipping away as the Roman consul recovered the position somewhat. Simultaneously the Roman centre was pushed back by the advancing phalangites, though as they advanced they exposed their own flank.  Above, the view of part of the centre, viewed from the Roman lines, while below a more general view slightly later.  With the centre engaged the Seleucid right was pressed by the advancing hastati of the Roman left. Here, though late in the day, a Seleucid general was critically lost. Now, with the Romans slowly gaining the initiative, & his own attack stalled, the Seleucid commander determined it time to conceded the field, though of course not the campaign. A most enjoyable game. |
|
|
|
Post by twrnz on Sept 22, 2020 9:57:59 GMT
Carthage & Rome clashed in a dramatic battle in Africa this evening. The Punic commander placed his hopes for victory on the use of a number of pachyderms, massed on his right wing. The Punic lines advanced with great determination with morale high.  The Roman light infantry opposite the Carthaginian right were over extended, as a result a number were cut down by Punic horse. However, rallying the Romans Stabilised the situation. Elsewhere, the main battle lines clashed. Here the Romans continued to gain ground. However, it was on the Carthaginian right where the Punic forces broke, and with it all hope of victory. |
|


